Table of Contents
Congratulations on purchasing Visual Portfolio Pro! This guide will walk you through the steps to download, install, and activate the Visual Portfolio Pro plugin on your WordPress site.
Downloading the Pro Plugin
Download from Email
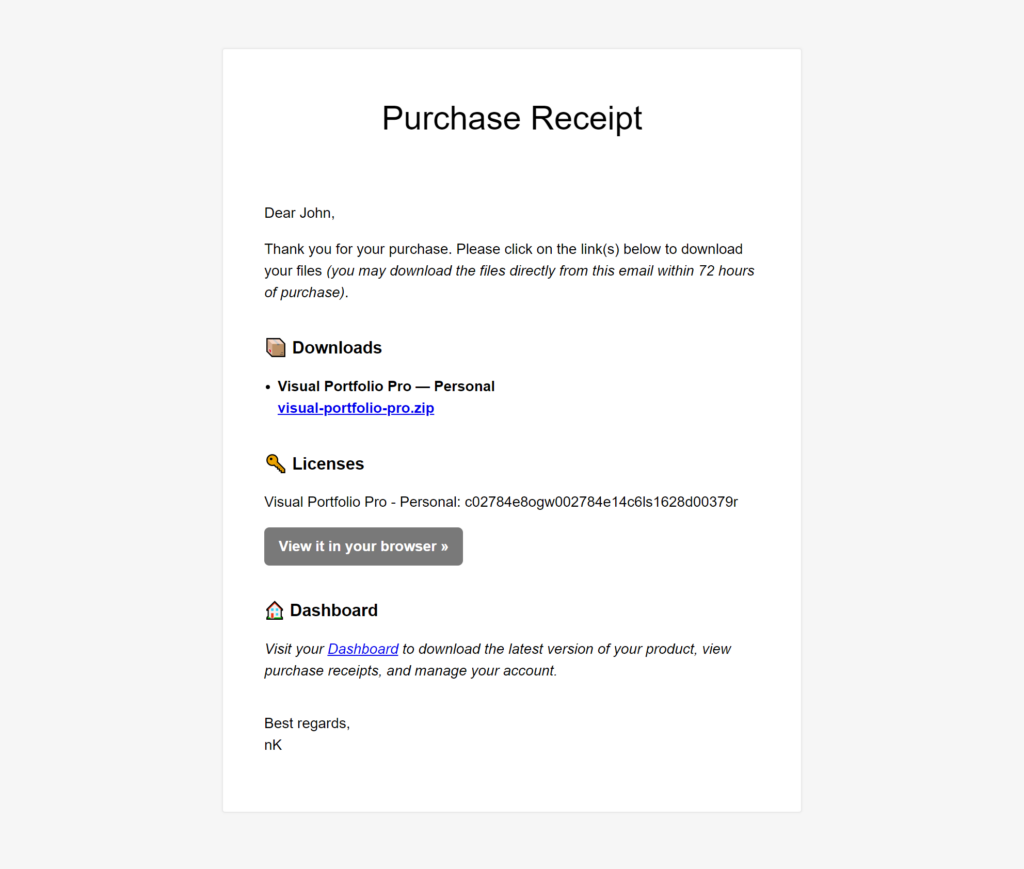
After your purchase, you will receive an email containing:
- A download link for the plugin (valid for 72 hours)
- Your license key
- A link to your account page
Click the download link in the email to get the plugin archive. If the download link isn’t working, follow the steps below to download from your account.
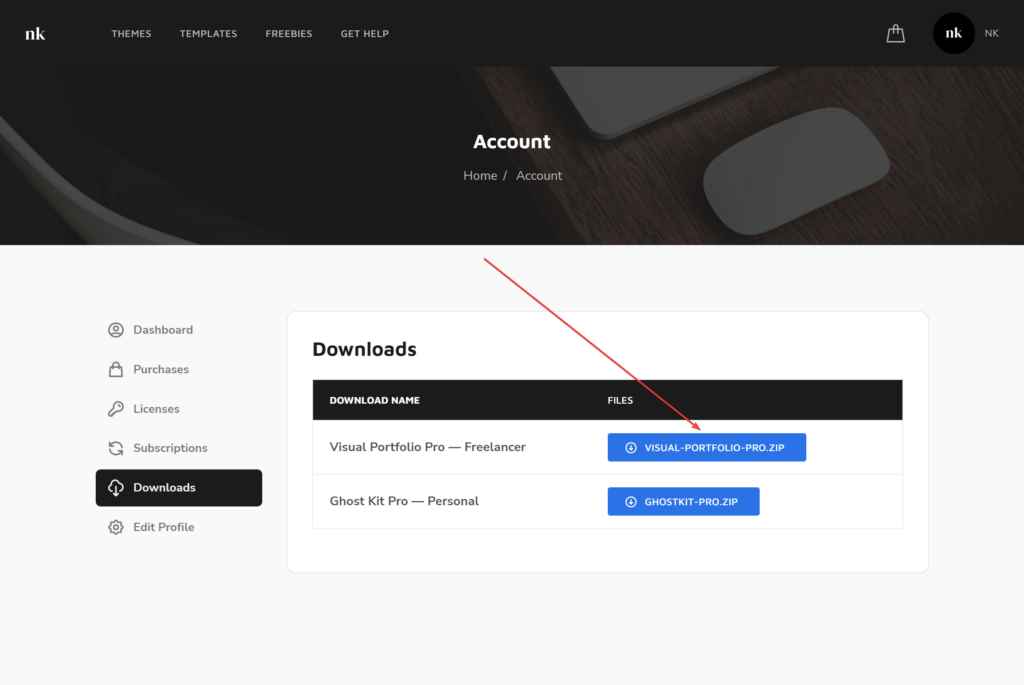
Download from Your Account
- Visit the account dashboard.
- Enter the login details received in the email after your purchase.
- Navigate to the Downloads section on the left side of the account dashboard.
- Click the download button to save the `.zip` file to your desktop.
Installing the Pro Plugin
- Go to your WordPress admin dashboard.
- Navigate to Admin Menu → Plugins → Add New
- Click on the Upload Plugin button at the top of the page
- Choose the zip file you have just downloaded
- Click Install Now
- After installation is complete, click Activate
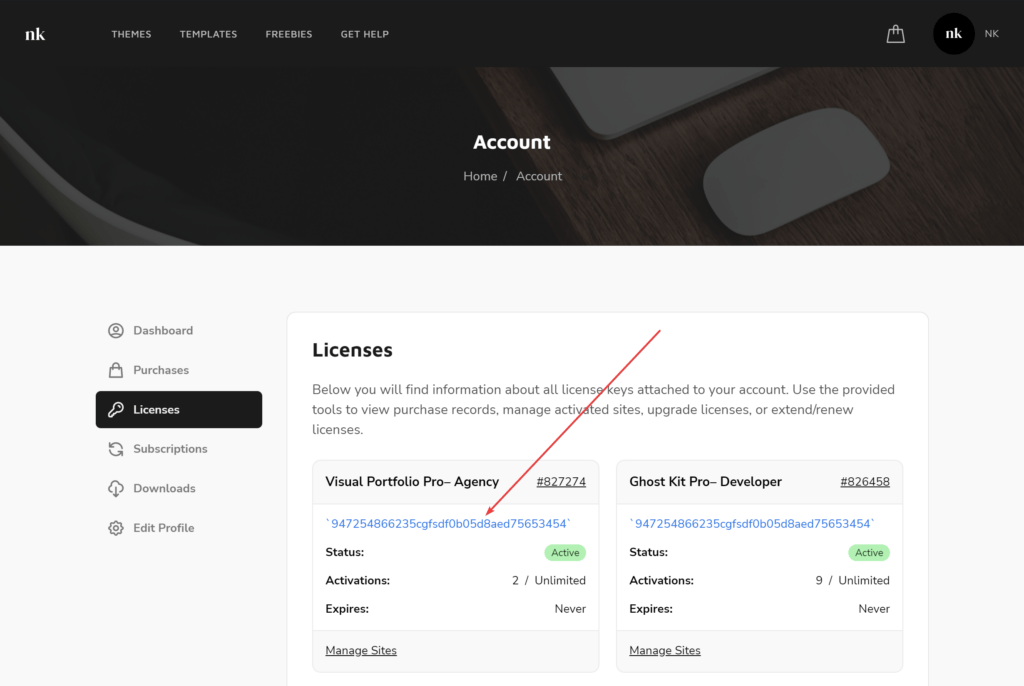
Getting Your License Key
For automatic updates, you’ll need to activate your license.
- Go to the account dashboard.
- Click on the Licenses section
- Copy your license key
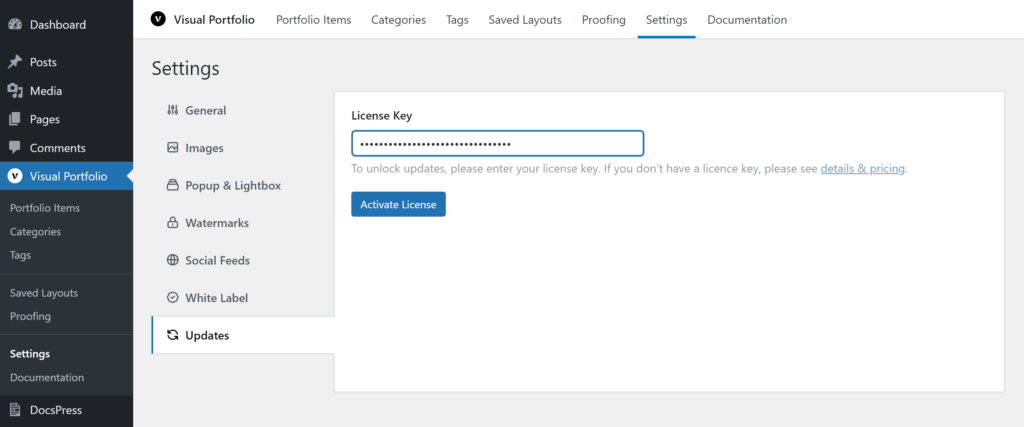
Activating Your License
- In your WordPress dashboard, go to Visual Portfolio → Settings → Updates
- Paste your license key into the provided field
- Click Activate License
Activation on Multisite Networks
If you are using Visual Portfolio Pro on a WordPress multisite network:
- Activate your license on the primary site of the network only
- There is no need to activate the license on each subsite